Straw crafting is an innovative and exciting field that combines creativity, resourcefulness, and eco-friendliness. The simplicity and versatility of straws make them an ideal crafting material for both hobbyists and professionals alike.
The beauty of this craft lies in its simplicity and versatility; with just a handful of straws, you can create anything from colorful jewelry to intricate wall hangings. More than just a fun pastime, straw crafting also encourages the development of fine motor skills, spatial awareness, and problem-solving abilities. It’s an engaging way to stir imagination and bring ideas to life.
This guide will provide step-by-step instructions and techniques to transform ordinary drinking straws into unique, handcrafted items. Whether these are craft business ideas or just want to engage in a fun, creative activity, straw crafting offers a world of possibilities for everyone.
Know How To Make Crafts With Straws
To start with straw crafting, you’ll need a few basic materials and tools. First and foremost, you’ll need straws, of course. These can be plastic, paper, or biodegradable, depending on your preference and the craft you’re making. Different colors and sizes can add variety to your creations.
In addition to straws, you’ll need tools for cutting and shaping. A pair of sharp scissors is essential for cutting straws into desired lengths. For bending and shaping straws, consider a pair of needle-nose pliers. To connect your straw pieces, you’ll need glue. A hot glue gun works best for larger projects, while craft glue suits smaller, more delicate designs.
Other useful items include:
- String or yarn for hanging crafts.
- Beads for embellishment.
- Recyclable materials like cardboard for base structures.
Remember, straw crafting is about creativity and resourcefulness—don’t be afraid to use what you have around the house. Keep in mind that safety comes first. Always supervise children when they are using scissors or a hot glue gun.
10 Simple Crafts With Straws To Do At Home
Here are 10 simple crafts you can do at home with straws.
Straw Rockets
Creating simple rockets using straws and paper is an easy and fun craft that can also serve as a basic introduction to aerodynamics.
- Start by cutting a rectangle out of a piece of paper. The dimensions should be about 5 inches long and 2 inches wide, but feel free to experiment with different sizes for different results.
- Roll the paper rectangle tightly around a straw, making sure not to roll it too tightly; you need to be able to move it along the straw.
- Tape the paper tube to ensure it maintains its shape, but make sure not to tape it to the straw.
- Using scissors, cut two small slits at the top of your paper tube, and slide a small paper triangle (your ‘rocket’s’ fins) into the slits.
- Place your paper rocket onto a straw and aim it upwards or in a safe direction. Blow into the straw and watch your rocket shoot into the air!
Remember, supervision is required when children are handling scissors. This craft is not only a fun activity but also a great way to learn about the principles of flight and momentum.
Straw Flowers
Creating colorful flowers from straws and paper is a delightful craft that adds color to any room.
- Gather your materials: colored paper, straws, scissors, and glue. You can choose straws and paper that match for a monochromatic look or mix and match for a multi-colored bouquet.
- Start by cutting the colored paper into circles. The size of the circles will determine the size of your flowers, so feel free to experiment with various sizes.
- Cut a spiral into each circle, starting outside and moving to the center. Try to keep the width of the spiral consistent.
- Pick up the spiral from the center point and start rolling it around, creating a “flower.” The center point will act as the base of the flower. Keep rolling until you reach the end of the spiral.
- Apply a dab of glue to the base of the flower to hold it in place. Allow it to dry.
- Once dry, you can attach your paper flower to the top of a straw. Apply a generous amount of glue to the top of the straw, and then press the base of the flower onto it. Let it dry fully.
- Repeat the steps above to create as many flowers as you want. You can even try making different types of flowers by varying the size and shape of the paper spirals.
Remember, this activity involves using scissors, so ensure children are supervised while crafting.
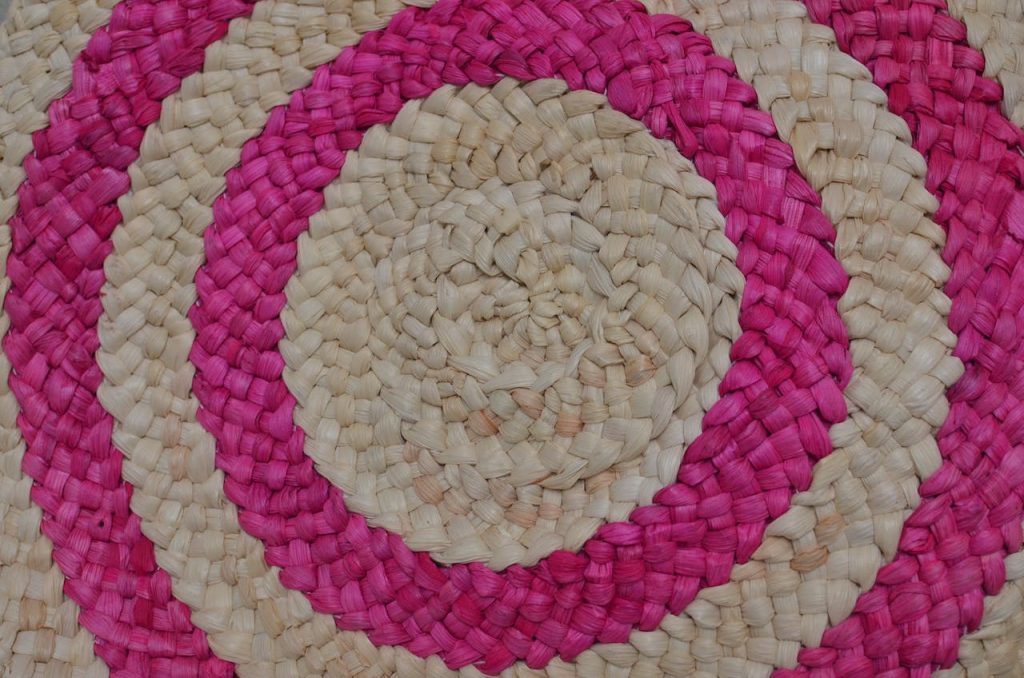
Straw Weaving
Weaving straws is a fascinating and simple way to create intricate patterns that can be beautiful decor elements or gifts. Here’s a step-by-step guide to get you started:
- Gather your materials: four to six straws, yarn or thread, scissors, and masking tape. Choose straws and yarn colors that complement each other for visually appealing results.
- Begin by cutting a long piece of yarn. The length will depend on your desired final product size, but as a rule, it’s better to have too much than too little. You can always trim excess later.
- Thread one end of the yarn through all the straws. One by one, ensure the yarn passes through each straw completely.
- Once threaded, align the straws side by side and secure them at one end with masking tape. This will serve as your loom’s base. Ensure the yarn’s loose end is still accessible.
- Hold the loose end of the yarn in one hand, and with the other hand, start weaving the yarn in and out of the straws. Start by going under the first straw, over the second, under the third, over the fourth, and so on.
- When you reach the last straw, go back the other way, altering the pattern; if you went over the last straw, go under it, then over the next, and so on.
- Continue this back-and-forth weaving until you’ve reached your desired length. Remember to push down the woven yarn occasionally to keep it tight and even.
- Once you’ve finished weaving, cut off the excess yarn. To secure the weave, you can simply tie a knot at the end of the last straw, or you can thread the yarn back through the straws one last time before tying it off.
This woven piece can serve as a mat, a coaster, or a bookmark. Remember, always supervise children when they are using scissors. Straw weaving is not only an engaging and creative activity but also a great way to develop fine motor skills and a sense of pattern recognition.
Straw Sculptures
Building sculptures with straws can be a creative and fascinating project. With just a few materials, you can construct various interesting geometric structures.
- Gather your materials: straws, scissors, and tape or pipe cleaners for joining the straws together. You can use straws of different colors for a more vibrant sculpture.
- Cut the straws into varying lengths. Having straws of different lengths will allow you to create more intricate and interesting shapes.
- Start by taping or twisting pipe cleaners to connect two straws. Use the connection point as a joint, and bend the straws in any direction.
- Continue connecting more straws to your structure. Experiment with different angles and configurations to see what shapes you can create.
- To create a 3D sculpture, build your structure outwards in different directions. Try forming triangles or squares, and then build upon these base shapes. Remember to secure all connection points with tape or pipe cleaners.
- Continue adding to your sculpture until you’re happy with its size and complexity. You can even combine several smaller structures to form a larger sculpture.
Remember, always supervise children when they are using scissors. Building straw sculptures not only stimulates creativity but also helps to develop spatial awareness and fine motor skills.
Straw Jewelry
Creating jewelry with straw beads is a fun and simple craft activity that allows you to make stylish accessories. Here’s a step-by-step guide:
- Gather your materials: straws, scissors, a needle, and thread or string. You can select straws of various colors to make your jewelry more vibrant.
- Begin by cutting the straws into small sections. These sections will serve as your beads. You can experiment with different lengths for varied aesthetics.
- Thread your needle and ensure there’s enough thread for the length of the necklace or bracelet you want to create. If you’re making this craft with children, you might want to use a plastic needle for safety.
- Start threading the straw beads onto the string. You can create patterns with different colored straws or keep them random for a more eclectic look.
- Once you’ve added enough straw beads, ensure the jewelry piece fits around your wrist or neck. Leave enough thread or string on both ends to tie the piece off.
- Tie the ends of the thread or string together in a strong knot, ensuring no extra space where the beads can slide off.
- Cut off any excess thread or string, leaving a small piece after the knot.
And there you have it – your own homemade straw bead jewelry! This activity is not only a fun and creative pastime, but it’s also a great way to develop fine motor skills. Always supervise children when they’re using scissors or a needle.
Straw Mobiles
Creating hanging mobiles with straws and lightweight objects is an exciting and creative activity. These mobiles can serve as unique home decor pieces or personalized gifts.
- Gather your materials: straws, string, scissors, lightweight objects (like paper shapes, beads, feathers), a needle, and a hoop or stick to hang your mobile from. You can select straws and objects in colors that suit your taste or match your decor.
- Start by preparing your straws. Cut them into varying lengths to add interest to your mobile. These will serve as the arms to hang your objects.
- Next, prepare your hanging objects. If you use paper shapes, cut them out and make a small hole at the top. If you’re using beads or feathers, these should already be ready to thread.
- Now, start assembling your mobile. Thread a string through each straw and tie a knot at one end to prevent the straw from sliding off. Attach your hanging objects to the other end of the string. You can add multiple objects to each string for a more layered look.
- Once you’ve prepared several of these straw and object strings, start attaching them to your hoop or stick. Tie them at different lengths to create a cascading effect.
- Finally, attach four strings to the hoop or stick, tying them together at the top to form a hanger. Ensure the mobile balances and adjust the strings as necessary.
Remember, always supervise children when they’re using scissors or a needle. Creating straw mobiles not only encourages creativity but also develops fine motor skills and spatial awareness, while the finished product adds a touch of personalized charm to any living space.
Straw Maze or Puzzle
Building a maze or puzzle with straws can be a stimulating and exciting project, bringing together creativity, problem-solving, and hands-on construction.
- Gather your materials: straws, scissors, and a large flat surface like cardboard, foam, or a tray. You will also need glue or tape to secure the straws.
- Begin by planning your maze. You can sketch the layout on paper or start arranging the straws directly on your base surface. Make sure to include dead ends and turns to add challenge to your maze.
- Start cutting the straws according to the lengths you need for the different parts of the maze. You can use different colored straws for different sections to make the maze more visually engaging.
- Once you’ve arranged the straws to form your maze, glue them to the base surface. Allow the glue to dry completely. If you’re using tape, ensure it’s secure and won’t easily peel off.
- After the maze is set, test it out! Use a small ball or marble to navigate through the maze, adjusting the tilt and angle of the base to guide the ball. If you find any sections too easy or hard, you can modify the maze.
Remember, children should be supervised using scissors or a hot glue gun. Creating a straw maze is a fun, hands-on activity that encourages problem-solving, spatial reasoning, and fine motor skills development.
Straw Animals
Crafting animals or insects using straws and paper is a fun and imaginative activity that brings the animal kingdom to life. Here’s a simple guide to get you started:
- Gather your materials: colored straws, paper, scissors, glue, markers or crayons, and googly eyes if you have them. You can choose straws and paper that match for a coherent look or mix and match for a more colorful creature.
- Start by choosing the animal or insect you want to create. For simplicity, you can create a straw butterfly.
- Cut a straw in half. These halves will serve as the butterfly’s body.
- Using the colored paper, cut out two large wings and two smaller wings. You can add details to the wings using markers or crayons.
- Glue the large wings to the top of one straw half and the smaller wings to the bottom of the same straw half. Let the glue dry.
- On the other straw half, glue the googly eyes at the top. If you don’t have googly eyes, you can draw them using a marker.
- Below the eyes, use a marker to draw a smiling mouth.
- Once the glue is dry, you can connect the two straw halves by making a small incision in each straw and joining them together.
- Repeat the steps above to create as many straw animals or insects as possible. You can even try making a whole zoo or garden of different creatures!
Remember, always supervise children when they are using scissors. Crafting straw animals not only stimulates creativity but also helps children to learn about the diverse animal kingdom.
Straw Paintbrushes
Creating custom paintbrushes with straws and materials like cotton or foam is a fun and creative way to experiment with different textures and brush strokes. Here’s a step-by-step guide:
- Gather your materials: straws, scissors, cotton balls or foam cut-outs, and tape or rubber bands. You can use different types and sizes of straws and materials to create a diverse range of brushes.
- Start by preparing your brush ends. If you’re using cotton balls, you can fluff them out a bit to create a softer brush. If you’re using foam, cut out small pieces in shapes that interest you – squares, circles, triangles, or even organic shapes.
- Attach the cotton or foam to one end of the straw. Using cotton, you can thread it onto the straw and secure it with a rubber band or tape. If you’re using foam, you can make a small hole in the foam piece and thread it onto the straw, securing it the same way.
- Repeat the process to create as many custom brushes as you want. Consider varying the size and shape of the cotton or foam, the length of the straws, and how you secure the material to the straw. Each variation will result in different types of brush strokes.
- Once your brushes are ready, dip them in paint and experiment on paper. Observe the different textures and patterns each brush creates.
Remember, always supervise children when they are using scissors. Creating custom straw paintbrushes is a fun and artistic activity, but it also encourages the exploration of different textures and materials and develops fine motor skills.
Straw Wind Chimes
Creating wind chimes with straws is a great way to repurpose materials into a delightful and decorative piece for your home or garden. Here’s how you can make your very own straw wind chimes:
- Gather your materials: straws, string, scissors, a hoop or stick to hang your chimes from, and any additional items you want to include in your wind chimes, such as beads or bells.
- Begin by cutting your straws into varying lengths. The different lengths will produce different pitches when they clink together, adding to the charm of your wind chimes.
- Thread a string through each straw. Tie a knot at one end of the string to prevent the straw from slipping off. You may also want to tie a knot at the other end, leaving a section of string to attach to the hoop or stick.
- If you’re including additional items like beads or bells in your wind chimes, thread them onto the string above or below the straw, tying a knot to keep them in place.
- Once you’ve prepared all your chime pieces, attach them to your hoop or stick. Space them out evenly, and vary the lengths of the strings to add visual interest.
- Finally, attach four strings to the hoop or stick, tying them together at the top to form a hanger. Ensure your wind chimes balance well, and adjust the strings as necessary.
Remember, always supervise children when they’re using scissors. Crafting straw wind chimes encourages creativity, develops fine motor skills, and creates a charming, handmade piece of decor that adds a gentle, pleasing sound to your environment.
Bottom Line
This guide explored various innovative and fun crafts using straws. It explored how to create intricate straw sculptures, stylish straw bead jewelry, and unique home decor with straw mobiles. It also delved into creating a stimulating straw maze, crafting adorable straw animals and insects, and experimenting with texture and brush strokes with custom straw paintbrushes.
Lastly, you learned how to transform straws into delightful wind chimes. These activities spark creativity while developing fine motor skills, spatial awareness, and problem-solving abilities. They also provide an excellent opportunity to repurpose straws into functional and decorative pieces, adding a personal touch to accessories and home decor.